version v7.2.
For up-to-date documentation, see the
latest version.
SonarQube usage
8 minute read
This guide will assist you in getting started with SonarQube and performing various tasks efficiently using the tool.
Some actions cannot be performed directly by users and should be performed by submitting a ticket.
Please visit the Platform page to review the specific instructions and tickets available on your platform.
Local Environment Setup
SonarQube for IDE
To install SonarQube for IDE in Visual Studio Code:
- Navigate to the Extensions view by selecting the Extensions icon in the Activity Bar on the side of the window.
- Search for
SonarQube for IDEin the search bar - Select the Install button next to the SonarQube for IDE extension from SonarSource.
Set Up the Connected Mode
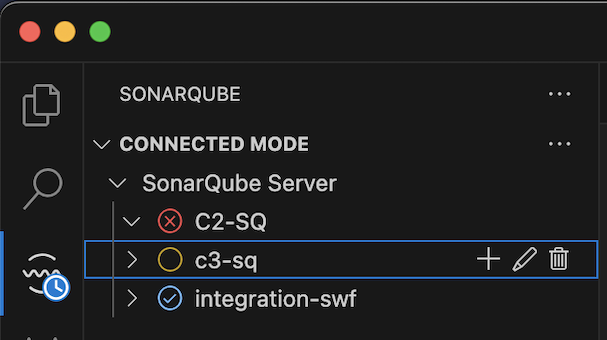
- Open the SonarQube for IDE in VSCode.
- Go to Connected Mode tab, at SonarQube Server level and select +.
- Fill the SonarQube Server Url.
- Select Generate Token : This will open your SonarQube server page to validate your credentials.
- Select
Save Connectionto establish the connection.
Once connected, you can select your project:
- Select + next to your server on the list
- Find your project to bind it.
Run Local Scan
- Ensure SonarQube for IDE is installed and connected in Connected Mode.
- Access the Command Palette by pressing Ctrl+Shift+P (or Cmd+Shift+P on macOS).
- Type and select
SonarQube: Analyze Current File With SonarQube - SonarQube will begin analyzing your code
- SonarQube IDE for VS Code will only analyze open files.
- SonarQube IDE for Eclipse, can analyze all files in the project.
Access to SonarQube
Generate Tokens
- Sign in to SonarQube with your user credentials,
- Select your profile avatar or name in the upper-right corner,
- Select
My Accountfrom the dropdown menu, - In the left-hand menu, select the
Securitytab.- Under the
Tokenssection, you will see a button to generate a new token.
- Under the
- Provide a descriptive name for the token, like
cicd-pipeline-token - Select a token type ( you can refer to SonarQube guide token )
- Set an expiration date for the token.
- Select
Generate Tokens.
Managing and Revoking Tokens
- Regular Review: Periodically review active tokens to ensure they are still necessary and scope/permissions are appropriate.
- Revocation: If a token is compromised or no longer needed, navigate to My Account > Security > Tokens and select the revoke button for the specific token.
Start a Scan
Create a New Project
To create a new project in SonarQube, follow these steps:
- Sign in to your SonarQube instance.
- From the main menu, select
Projectsand thenCreate Project. - Enter the project details:
- Provide a name for the project, a unique project key, and optionally a project description.
Please take a look to an exemple of a Python Project for detailed instructions on setting up quality checks.
Add Quality Profile
- Navigate to your project.
- Select the
Project Settings. - Select
Quality Profilesfrom the left menu. - you will see a list of already used quality profiles.
- Select
Add Language - Choose the relevant language from the dropdown menu.
- Select the quality profile you wish to assign to your project.
- Confirm your action by selecting
Save.
Organize Dashboard
Depending on your platform, as an user you may have the ability to create Application or Portfolio. If not, only the platform administrators can perform the following actions.
Create an Application

- Sign in to your SonarQube instance.
- From the main menu, you should see a button at the top right labeled
Create Application. - Define the Application details:
- Name: Enter a descriptive name for your application (e.g.,
my awesome app). - Key: Provide a unique identifier for the application.
This key should follow the naming conventions your platforms uses. (
my-awesome-app) - Description: (Optional) Provide a brief description of the application’s purpose.
- Name: Enter a descriptive name for your application (e.g.,
Add projects to an Application
- Navigate to your newly created Application.
- Select the Application Settings Menu.
- Select the Edit Definition.
- Search and Select projects that will be part of this application.
- Select The Branch that you want to include in the application.
Create a Portfolio

- Sign in to your SonarQube instance.
- At the top menu, select Portfolio next to Project.
- From here, you can view the portfolios
- Select the Create Portfolio button to start creating a new portfolio.
With Administrator privileges, you can manage Portfolios under Administration > Configuration > Portfolios.
Setup a Portfolio
- Navigate to the Portfolios section from the main menu.
- Select your Portfolio
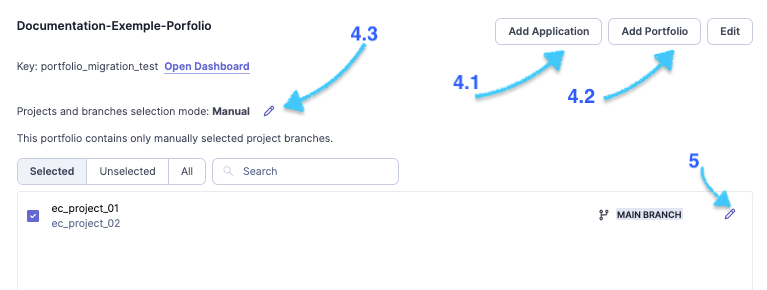
- At the right side of the screen, select the Portfolio Settings > Edit Definition.
- You can define the contents of your portfolio by adding Projects, Application or other Portfolios.
- To add Application, select the buttom Add Application
- To add Portfolio, select the buttom Add Portfolio
- To add Project, select the pencil icon next to Project selection mode, select Manual, then use the search bar to find and select the projects you want to include.
- You can also choose the Branch that you want to include in the portfolio.
By default, the
Main BRANCHwill be selected.
How to manage issues
Ensure SonarQube is properly set up in your CI/CD pipeline, that you have define a quality gates that set thresholds for code quality, including metrics like code coverage, duplications, complexity, and more.
Run your project through CI to perform an analysis and gather a baseline of your code quality.
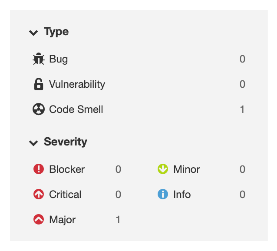
Review the issues identified by SonarQube in Issues tabs. Issues are categorized into bugs, vulnerabilities, code smells, security hotspots, and duplications.
Prioritize issues based on their severity (Blocker, Critical, Major, Minor, Info):
- Focus on high-severity issues (Blockers and Critical) first as they could have the most significant impact on your application.
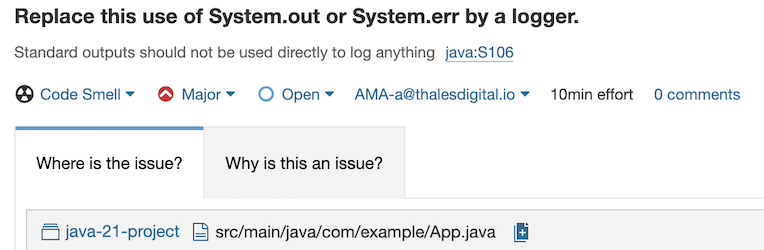
- Open an issue by selecting it for more details.
Assigning and Resolving Issues
Assign issues to the appropriate team members who have the knowledge and responsibility to address them.
- Developers should address the assigned issues in their codebase. Follow the recommendations provided by SonarQube for resolving the issues.
- Ensure each fix includes appropriate testing to verify that it resolves the issue without introducing new problems.
- Conduct code reviews to ensure that the fixes correctly address the issues and follow best practices.
- Use SonarQube’s pull request decoration feature to see issues in the context of pull requests.
After validating changes, rerun the SonarQube analysis to verify that issues have been resolved and to catch any new issues that may have been introduced.
Use SonarQube’s dashboards and reports to track the progress of issue resolution over time.
- Share these reports regularly with stakeholders to keep them informed about the code quality and any technical debt.
Display Quality
View Badges SonarQube
- Go to your project dashboard in SonarQube,
- Navigate to Project Information on the top right of the page,
- Open Get project badges section,
- Select one of the different badge options, such as quality gate status, coverage, and reliability rating and the format.
- Copy the URL/Code of the required badge.
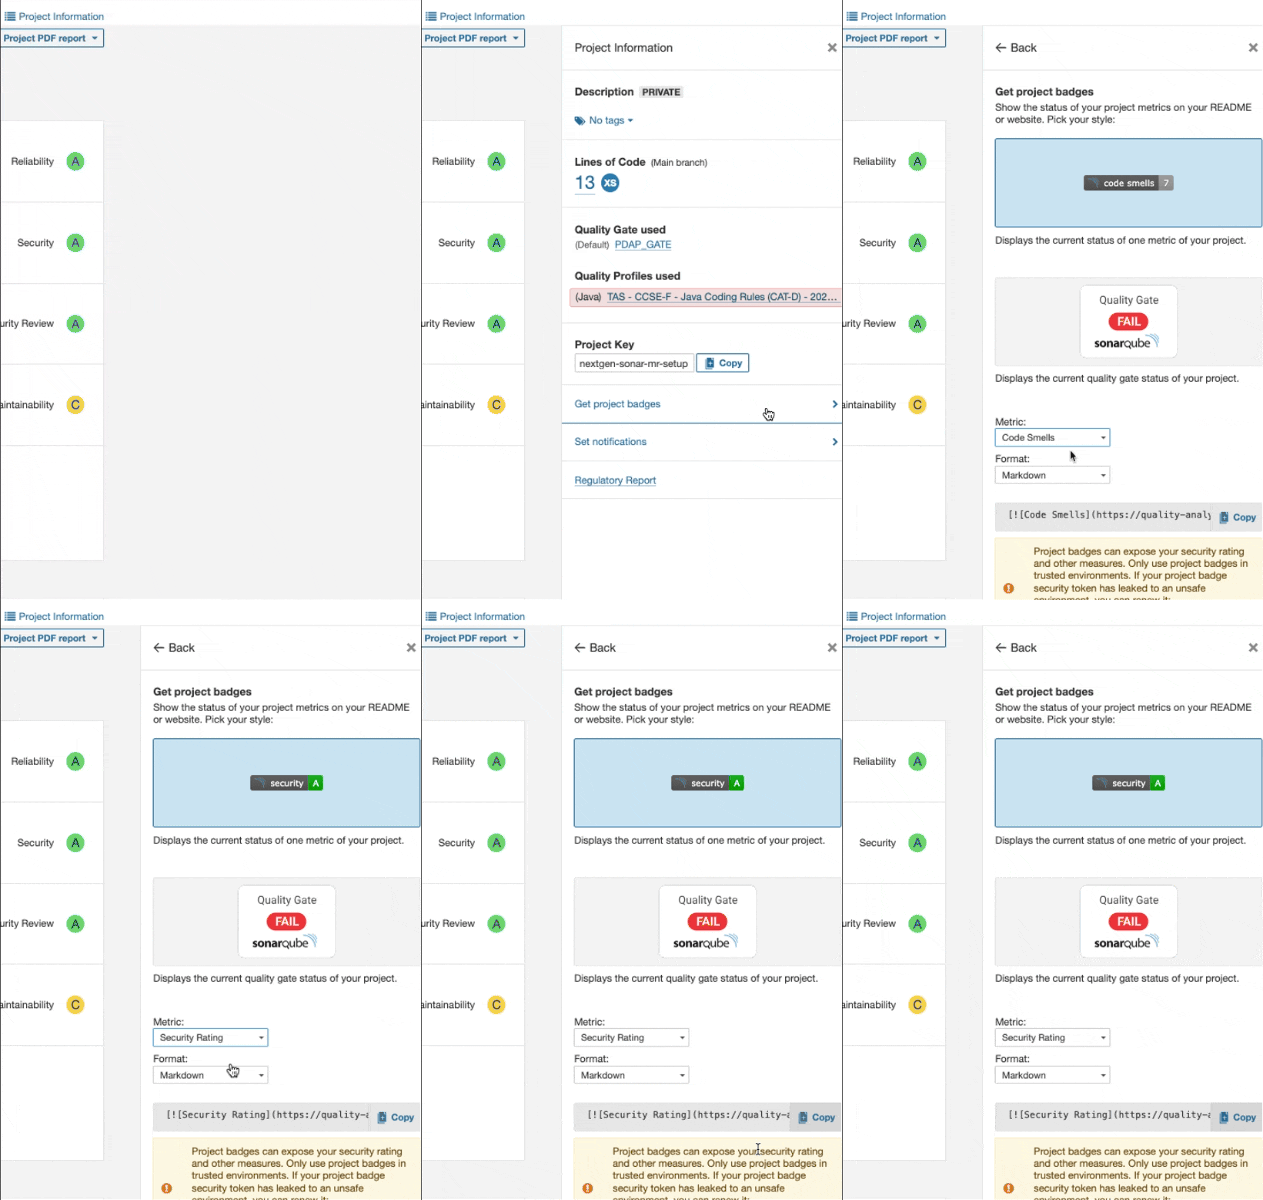
You can now use this badge in your documentation or README file to showcase the project’s code quality status.
Badge in GitLab Project
- Open your GitLab project.
- Go to the repository’s main page.
- On the left sidebar, navigate to Settings > General.
- Expand the
General project settingssection. Locate the “Badges” section and selectAdd Badge. - Fill in the fields as follows with Name and Link (e.g., https://sonar.example.com/dashboard?id=your_project_key )
- Badge Image URL: Paste the copied badge URL from SonarQube (e.g., https://sonar.example.com/api/project_badges/measure?project=your_project_key&metric=coverage ).
- Select
Add Badgeto save the badge.
Badge in GitLab README
If you chose the markdown format in step 4 (SonarQube part),
you can add the generated code directly to the file README.md:
- Edit your
README.mdfile, - Paste the code that was generated at step5,
- save and commit your changes
Advanced Customization
The platform should restrict the access to users the capability to create / modify quality profiles, as they are shared and visible accross the instance.
Users should request to their Platform Adminitrators a request a Creation or Extension of a Quality Profile.
Create Quality Profile
Instance Adminstrator Privileges or Create Quality Profile Rights:
- Navigate to
Quality profile - At the top right corner, you can see two buttons at the top right:
createandrestore.- Create: allow create a blank profile, a copy of an existing profile or an extend of an existing profile for a specific language
- Restore: This option enables you to import from a backup file (XML) if provided by user.
Extend an Existing Quality Profile
Instance Adminstrator Privileges or Create Quality Profile Rights:
- Go to
Quality profile - Type the language of the profile you want to extend in Filter profiles by:
- Select an existing profile (the one you want to extend from)
- Select the gear at the top right of the page
- Select
Extend - Name your new profile.
Once created, You can grant the permission to manage to the requester.
Manage a specific quality profile
Instance Adminstrator Privileges or Create Quality Profile Rights:
You can delegate the management (add / change rules in a quality profile) to users.
- Go to
Quality profiletabs - Select the profile you want to manage. (filter by language if needed)
- Go at the button of the page and select the
Grant permissions to more users. - Select the user or group you want to grant permissions to and select
Save.
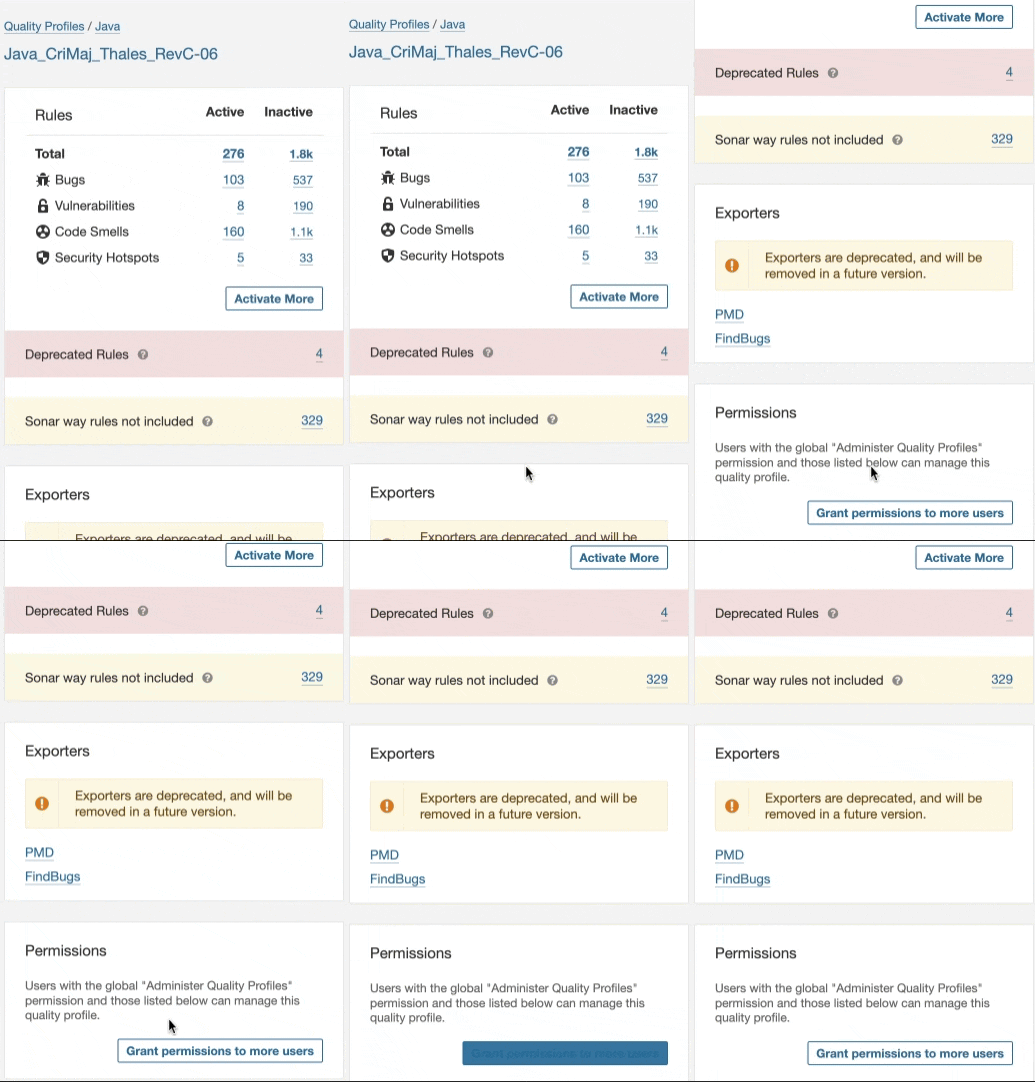
This method is recommended over granting everyone with Administer Quality Profile privilege. This avoid having users modify quality profiles that they are not under their scope.