version v7.2.
For up-to-date documentation, see the
latest version.
Getting Started with JetBrains
2 minute read
Prerequisites
- Subscribe to Code Companion offer (this requires MFA and a TDF Account ).
Installation
Install and launch Intellij (or any other IDE from the JetBrains suite)
- If you have the Continue.dev extension installed, please uninstall or deactivate this extension.
Install Code Companion extension:
Open your JetBrains IDE and open Settings using
Ctrl+alt+SSelect Plugins on the sidebar and search for “Install Plugin from Disk…” in the settings icon
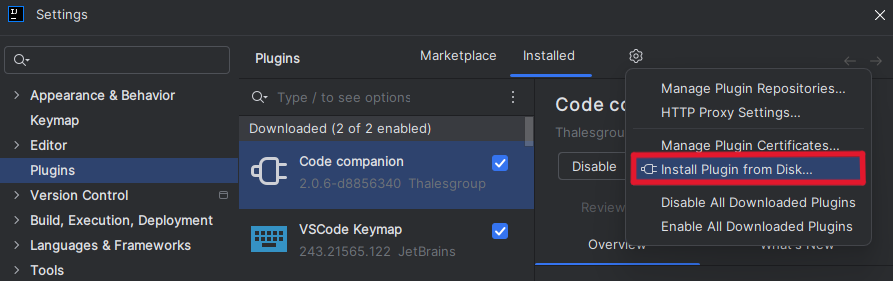
- Choose the downloaded .zip file and select “OK”
Network Prerequisites
- If you’re receiving empty outputs from Code Companion, please check this section.
Known Issues
JetBrains has a few known issues with packaging (such as Java Runtime and Security Restrictions) see JetBrains Packaging Issues for more info.
Starting with JetBrains IDE version 2025.1, you might encounter Freeze Issues, see JetBrains Freeze Issues for more details.
First Usage
Please take into consideration that this step has to be done each time restart your IDE, because Intellij doesn’t retain session tokens
Make sure you’ve read and agreed to the terms and conditions.
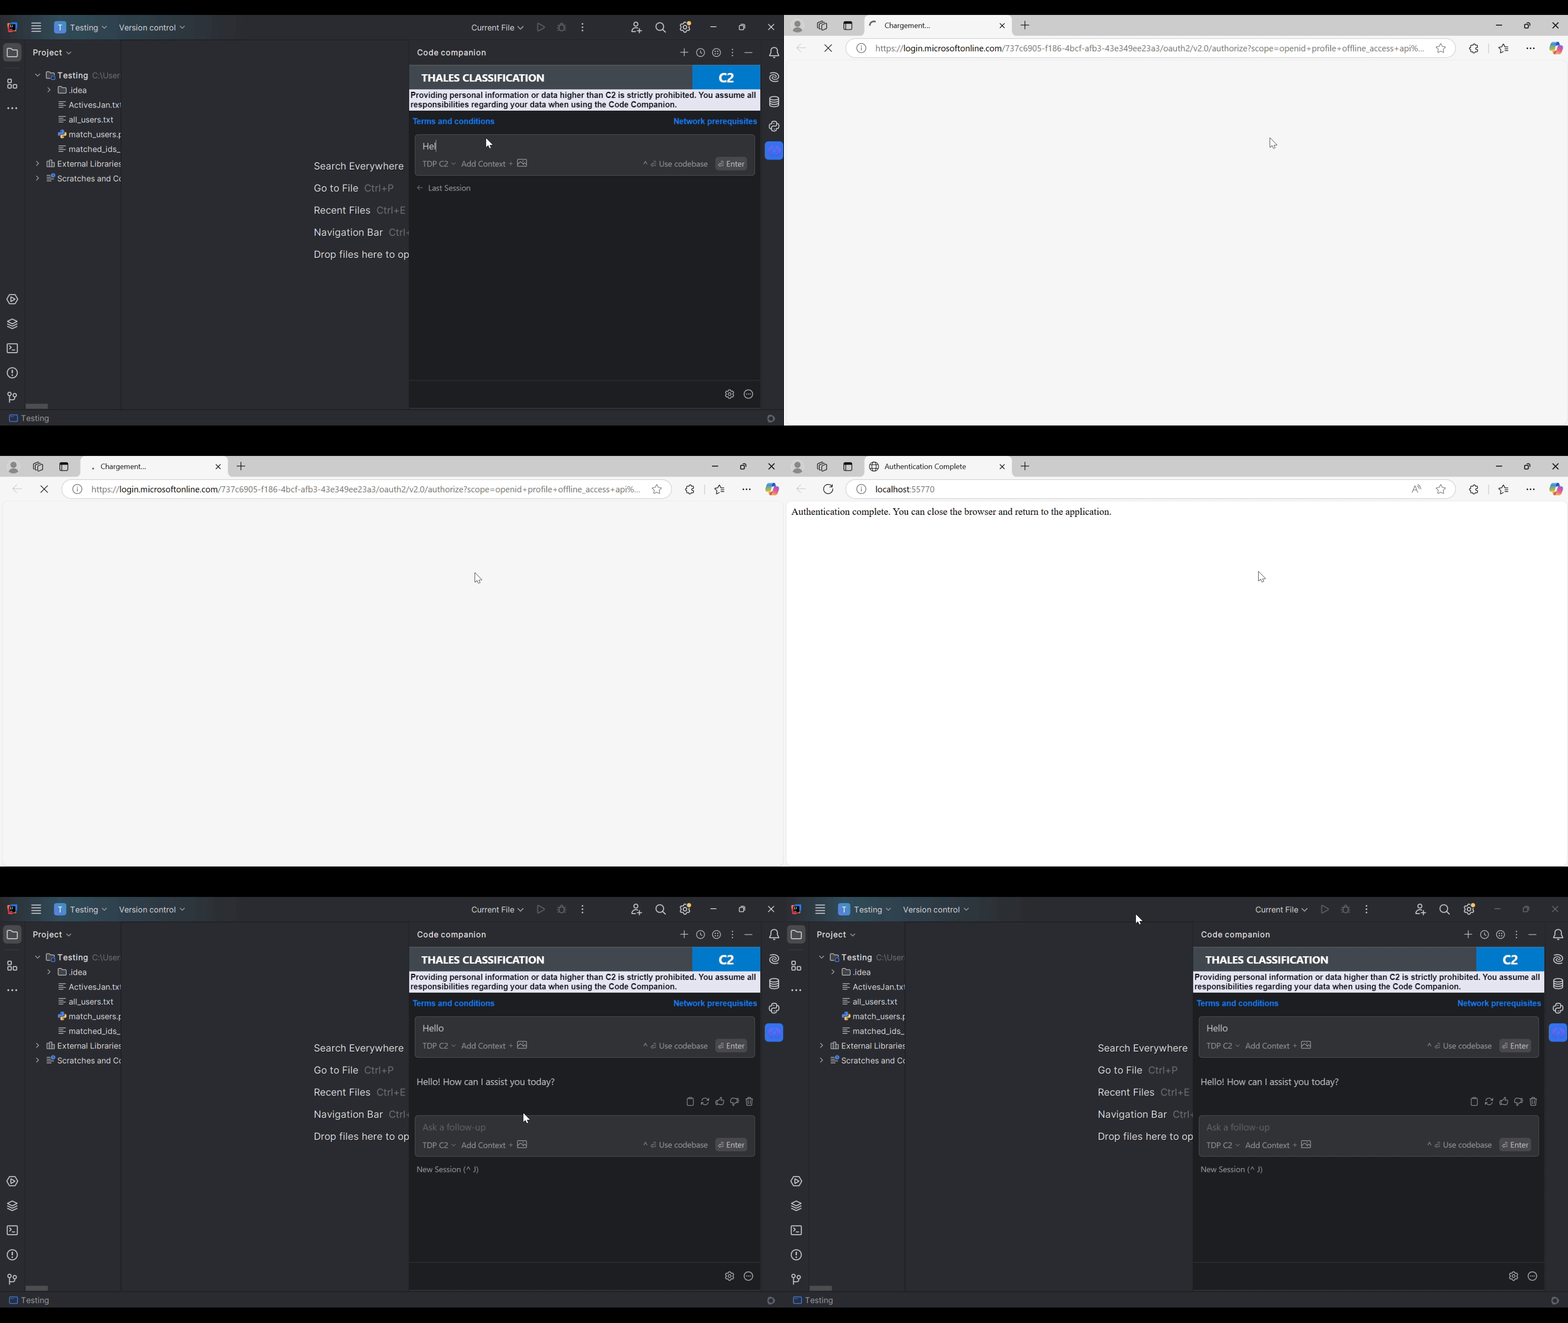
In Intellij, enter your first prompt to Code Companion. (Refer to Chat Usage if you need guidance).
A popup will ask you to allow sign-in using Microsoft: select “Allow” and follow the steps to sign in using your Thales email.
You are now logged in and can start using Code Companion. If you encounter any issues while installing, please check out our troubleshooting section or contact us.